Blog
Configuring NetSuite WorkForce
It is important that the Workforce module is configured correctly for it to produce the correct results. The following is a high-level glance at the configuration.
Workforce manages and tracks employee headcount and expenses. This is accomplished by analyzing, calculating, and reporting on headcount, salary, bonuses, taxes, health care expenses, etc. It also helps with planning for new hires, transfers, promotions, terminations, and so on for the new planning cycle.
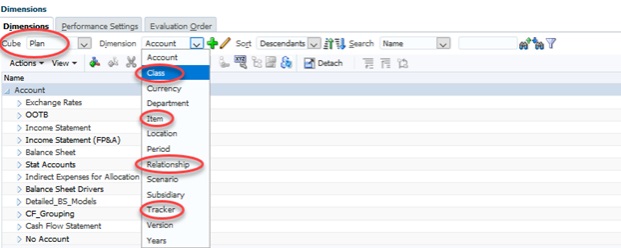
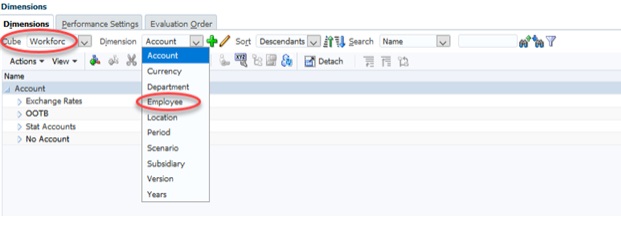
DIMENSIONALITYWorkforce has its own cube and any changes made within Workforce will not affect the other cubes. It has 10 dimensions as compared to the Plan cube which has 13. The Class, Item, Relationship, and Tracker dimensions are not configured for use in Workforce and the Employee dimension is not configured for use in Plan.
 Accounts
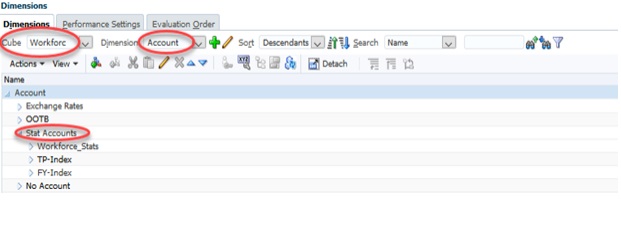
The account dimension in the Workforce cube has fewer members than the account dimension for the Plan cube. Workforce doesn't need all the income statement and balance sheet accounts that are part of the dimensions for the Plan and Detail cubes. The earnings, taxes, benefits, etc. employee information that is calculated in Workforce is pushed into the Expense accounts through a business rule so that they are included on the OpEx forms/reports.
 Employees
Employees must be saved in the Employee Dimension for them to show on the Company Roster. Their data can be loaded from other sources or entered manually into the system. SmartView can be utilized to submit the data from another source system.
Adding New and New 'To Be Hired' (TBH) EmployeesAn employee's number/name is added under the Existing_Emps roll-up. It is usually set up with an employee number for the member name and the employee's actual name as the Alias. If there are open positions to be filled in the upcoming plan year the member names TBH1, TBH2, etc. (To Be Hired) can be added under the New_Emps roll-up to hold a position. This will allow for salary, bonus, employer part of benefits, etc. to be calculated for that position.

When adding a new employee, you go to the Employee Dimension and drill down to the roll-up for Existing_Emps. Next you go to the last member in that roll-up and select the button to add a sibling.
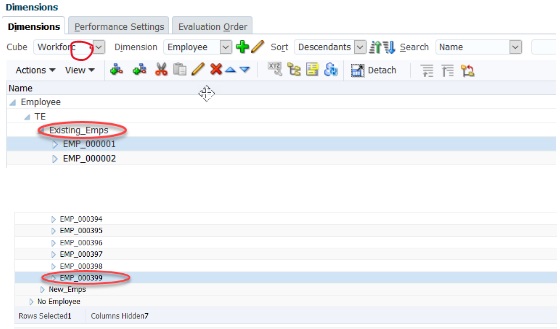
For the name use employee number. If there aren’t assigned employee numbers use the next sequential number. For alias enter the employee name. The other selections should be set the same as the example below (for example the Data Storage should be Store).
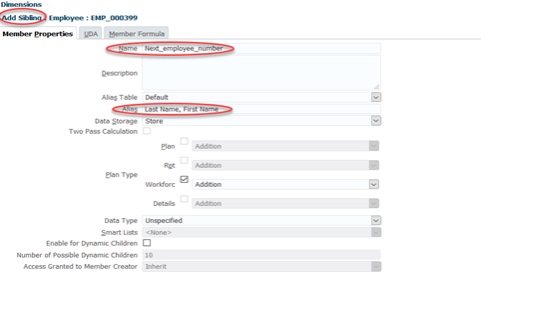
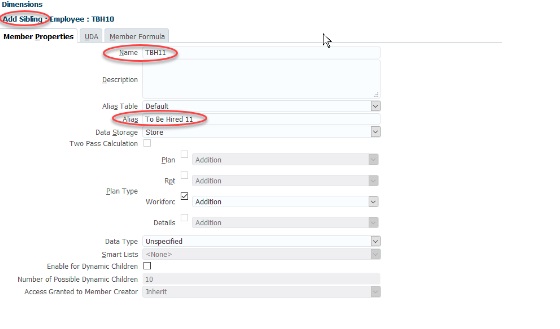
If there are open positions to be filled in the upcoming budget year the member names under the New_Emps roll-up can be used to hold a position. Drill down to the roll-up for New_Emps. Next you go to the last member in that roll-up and select the button to add a sibling. For the name use the next sequential number. The other selections should be set the same as the example below (for example the Data Storage should be Store).
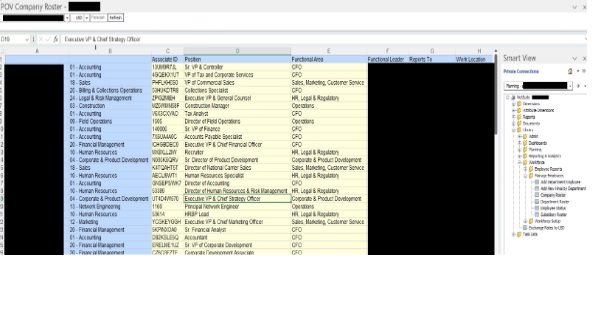
To load the employee data using SmartView make sure that the spreadsheet is in the same format as the company roster and then submit data.
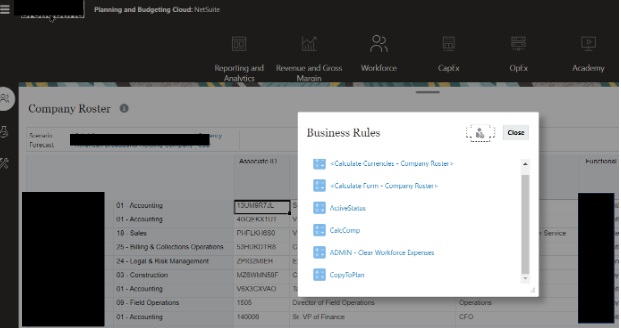
After the data is successfully uploaded to Workforce you will need to execute several business rules. This can be done manually through Smartview or by opening the Company Roster on the cloud and hitting save.
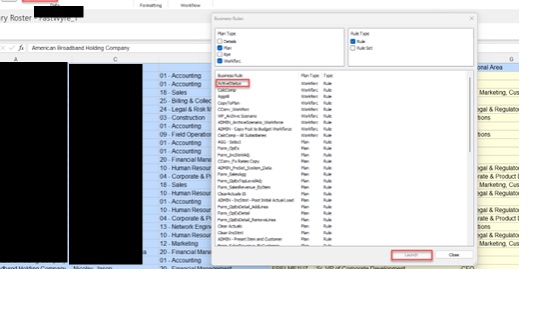
To run the rules from Smartview go to the Planning tab and look for the Calculate icon. Click the dropdown and select Business Rules.
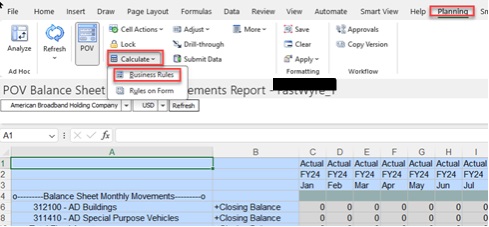
A form will open that lists the business rules. It is important that these rules are run in the following order:
- Active Status (Plan type – Workforce)
- CalcComp (Plan type – Workforce)
- Admin – Clear Workforce Expenses (Plan type – Plan)
- CopyToPlan (Plan type – Workforce)
Select the rule name and click the Launch button at the bottom of the form. If the rule takes longer than the timeout is set for in Smartview you will need to go to Jobs in the cloud application.
To kick off the business rules so they will run automatically go to the Company roster form in the cloud application and hit save. All the rules will run in the correct order.
 Setup Forms
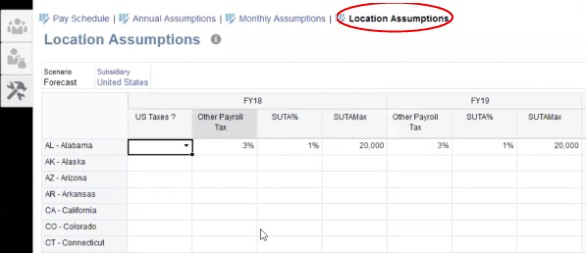
The Setup tab on the Workforce module lists forms for the Pay Schedule, Annual Assumptions, Monthly Assumptions and Location Assumptions. This is where you enter values that will be used in the business rules and calculations for employee expenses.
Company Pay ScheduleThis is where you enter the workdays and the pay periods per month for your business.
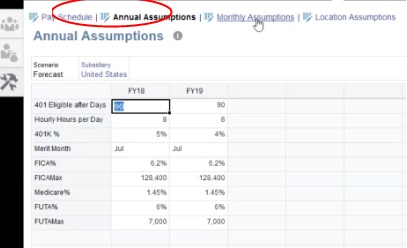
 Annual Assumptions
This is where you enter tax capabilities for the plan year along with number of days before eligible for 401k, merit month and benefit raise percents for the plan year.
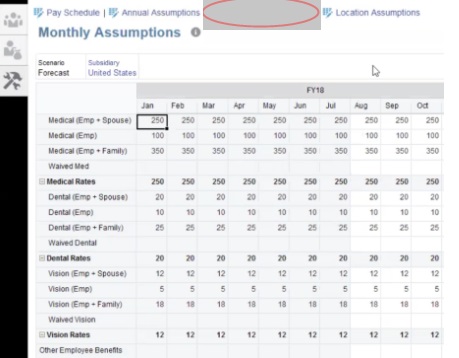
 Monthly Assumptions
This is where you enter the data to compute the cost of employee benefits.
 Location Assumptions
This is where you enter any state specific tax assumptions for different states that you need to use for your tax calculations.
Contact MindStream Analytics
Have questions for our team of NetSuite experts? Please complete the form below and we'll get back to you shortly.
Partner SpotLight
![]()
NetSuite SuiteSuccess
NetSuite SuiteSuccess offers a pathway for businesses to succeed by engaging with them continuously throughout their lifecycle. NetSuite delivers a unique set of processes, activities, and systems designed to deliver rapid value. Customers are equipped to make the most of their NetSuite investment quickly and are able to expand towards next-generation solutions to meet changing business needs.

